To install an adjustable bed at home, start by clearing the designated space and confirming that you have all parts and tools, including a nearby electrical outlet. Assemble the bed frame by following detailed instructions and securing bolts and screws tightly. Connect electrical components, ensuring the frame is stable. Install the adjustable mechanism, testing remote features and assuring smooth operation. Fit the mattress on the bed frame using straps, and test for comfort. Conduct safety checks by verifying connections, securing wires, and confirming weight capacity and stability. This careful approach is essential to achieving a fully functional adjustable bed.
Quick Info
- Thoroughly read the instruction manual before beginning the installation process.
- Ensure all parts and tools are available and the designated area is clear.
- Securely tighten all bolts and screws during the bed frame assembly.
- Test adjustable mechanisms and remote control functions for smooth operation.
- Use straps or grips to secure the mattress and check for comfort in different positions.
Unpacking and Preparation
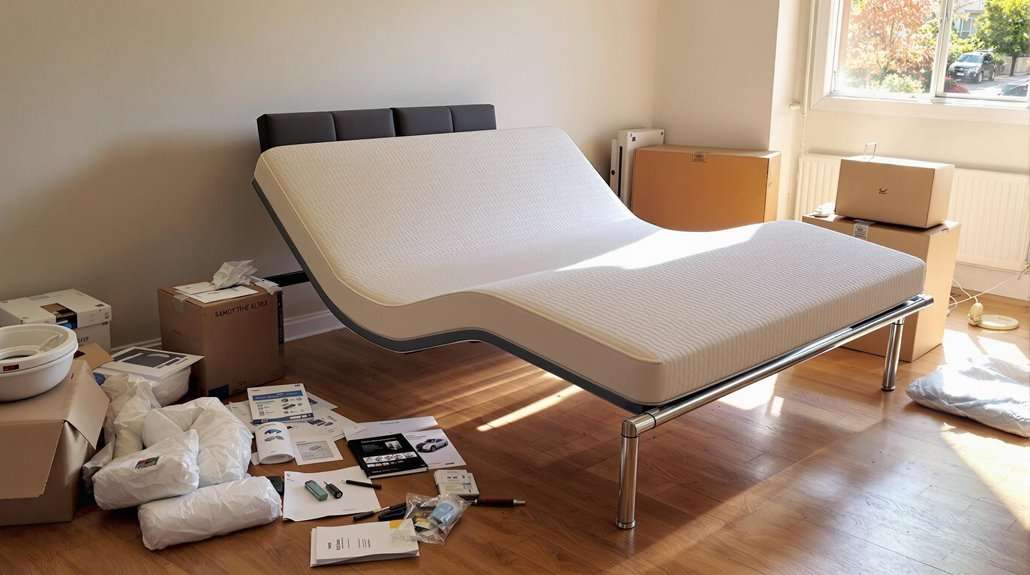
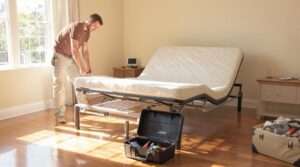
Unpacking and preparing an adjustable bed involves a series of precise steps to guarantee the process proceeds smoothly and safely. Begin by carefully transporting the shipping box to the designated bedroom, ensuring the package remains intact. Once in place, unfold the bed base with the underside facing up to access and organize the various components included. Pay particular attention to identifying essential items such as legs, power cords, remote controls, and connecting straps. Safety remains vital during this phase, so exercise caution around pinch points, as components may shift during transit.
A well-thought-out workspace setup is important for efficiency and protection. Clear the area of obstructions to allow the bed base to lie flat or in an L-position. Employ protective measures, like blankets, to shield both the bed and flooring. Locate the component box, ensuring access to the remote control, power cord, synchronization cable, and emergency backup battery pack. Remove any cardboard packaging, retainer bars, and connecting straps from the base. Retain the user manual for future reference. Finally, inspect each component meticulously for any signs of damage or missing parts before proceeding further.
Assembling the Bed Frame
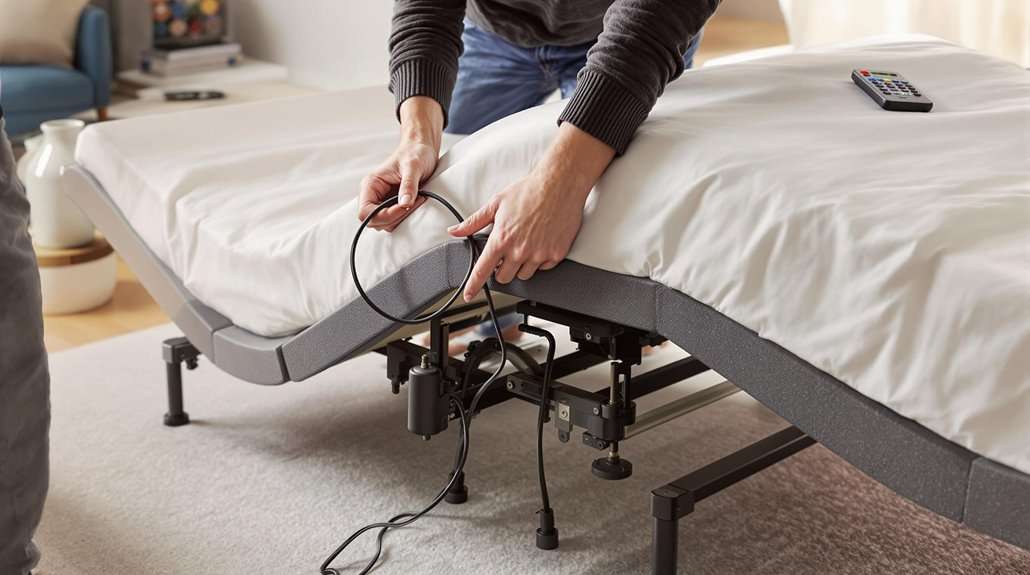
Constructing the bed frame of an adjustable bed demands meticulous attention to detail to guarantee functionality and safety. Begin by aligning the head and foot bases, making sure the foot base is slightly elevated. This positioning is vital for optimal bed frame stability. Attach the connecting bar, securing it with two bolts using a 13mm wrench. Next, integrate the control box, connecting the foot motor and massage cables. This step involves careful cable management, making sure that all wires are securely plugged to prevent any potential damage.
Proceed to attaching the legs and retainer bar. Screw in all six bed legs into the designated holes on the frame, and introduce the retainer bar into the quick-connect brackets located at the bed's foot. Secure it with wing nuts, verifying that both the legs and the retainer bar are firmly affixed. For non-carpeted surfaces, add anti-skid pads to the legs to enhance stability.
Finalize the assembly by carefully turning the bed frame over, taking precautions to avoid damage. Confirm the installation of any additional components, such as center support bars, to reinforce bed frame stability. Ensure all elements are securely attached, completing the assembly process with precision.
Power and Remote Setup
With the bed frame firmly assembled, attention now turns to the meticulous setup of the power and remote systems to guarantee peak functionality. Initiating this process requires connecting the power cord to the power supply box, ensuring it remains unblocked by the bed or headboard. Uncoil the input power cord, attach it to the power supply box, and secure the opposite end into a surge-protected power outlet to safeguard the system against electrical fluctuations.
Following power connection, focus shifts to the remote's battery maintenance. Open the remote's battery compartment by applying pressure at the bottom, then insert three AAA batteries, following the correct polarity to avoid potential damage. Securely close the compartment to guarantee continuous operation.
With power and batteries set, initiate the remote pairing process. Press the pairing button on the control box until the indicator light flashes, then hold the "SW" or "PAIR" button on the remote until it mirrors this flashing. Finalize pairing by pressing "HEAD UP," and verify success when the control box LED turns green. Should issues arise, refer to the owner's manual for troubleshooting guidance. Test all remote functions to confirm reliable control, addressing any discrepancies promptly.
Syncing Split Bases
Syncing split bases is an essential step in guaranteeing the seamless operation of larger adjustable beds, such as split king or split California king sizes. These bases, comprising two separate adjustable units, require a proper syncing process to function cohesively. Begin by positioning each base in the flat configuration and identifying the sync input on their respective control boxes. The synchronization cable connects these inputs, establishing a unified system for the head and foot sections to move in tandem.
Here is a concise procedure to guide you:
| Step | Action | Troubleshooting Tips |
|---|---|---|
| 1 | Unpack and lay out components | Verify all components are intact |
| 2 | Set bases to flat position | Confirm both bases are level |
| 3 | Connect sync cable | Double-check cable is securely linked |
| 4 | Power on and test movement | Use remote to verify synchronous movement |
| 5 | If issues, consult manual | Refer to user manual for detailed guidance |
Upon connecting the synchronization cable, power both bases and use the remote control to verify synchronized movements. If discrepancies arise, inspect the sync cable connections, and consult the manual for troubleshooting tips. This methodical approach guarantees the adjustable bed operates smoothly, enhancing the comfort and satisfaction of those you serve.
Final Assembly Check

Following the successful synchronization of split bases, attention must now turn to the final assembly check to guarantee the adjustable bed is fully operational and safe for use. Begin with stability verification by making sure the base is level and steady on the floor to prevent any unwanted movement during operation. This involves confirming that all legs are securely installed by screwing them into the threaded holes to the desired height and checking the base's overall alignment.
Component completeness is essential; verify all necessary parts are accounted for, including the power transformer, mains power cable, control box, and mattress retention bars. Correctly insert the mattress retention bars into the designated holes at the foot end of the base to maintain the mattress's position during adjustments.
Proceed with remote testing by installing AAA batteries into the remote control and evaluating all functions, such as head and foot lifts, zero-G positioning, and massage modes, ensuring each feature operates smoothly. Additionally, confirm the power connection by plugging the bed into a power outlet and activating the power switch. Conduct a final inspection to make sure that all parts are securely attached, and the bed is ready for optimal use.
Safety and Troubleshooting
Ensuring the safety and proper functioning of an adjustable bed involves several critical steps. Adhering to safety precautions is paramount, beginning with ensuring electrical components remain unobstructed during operation. Regular checks are essential to confirm the bed's full functionality, especially before leaving a user unattended. Installation tips recommend using reinforced mounting points, with the installation ideally performed by authorized technicians to uphold safety standards and warranty conditions. Respecting weight limits, typically between 250-400 pounds, is necessary to prevent rail failure, while maintaining a gap of less than 4 inches between the rail and mattress prevents entrapment.
Incorporating maintenance suggestions, routine cleaning per manufacturer instructions aids in prolonging the bed's lifespan. Troubleshooting common issues requires attention to electrical grounding to avert shock or fire hazards. Inspect for blockages in air openings to mitigate overheating risks, and avoid using adapters unless verified by a qualified electrician. Regularly inspect rails for unusual movement or resistance, addressing any misalignment promptly. Special considerations include consulting an Allied Health Professional for users with specific medical needs and ensuring the bed's suitability for the user's dimensions. Supervising children and pets around the bed minimizes injury risks, reinforcing overall safety.
Frequently Asked Questions
Can the Bed Be Installed on a Slatted Bed Frame?
Yes, an adjustable bed can be installed on a slatted bed frame. Confirm slatted bed compatibility, follow installation tips, adjust bed height appropriately, and incorporate maintenance tips to guarantee stability and longevity while serving comfort needs effectively.
How Do I Adjust the Bed's Height if Needed Later?
To adjust the bed's height post-installation, utilize adjustment options like built-in mechanisms or leg extension systems. Maintenance tips include ensuring stability, considering weight limits, and consulting the manufacturer for accessory compatibility and warranty compliance.
Is the Adjustable Bed Compatible With All Mattress Types?
Adjustable beds offer extensive mattress compatibility, accommodating memory foam, innerspring, and hybrid mattresses while providing benefits such as customizable adjusting features. However, specialty mattresses like waterbeds may not be compatible, requiring specific customization for best functionality.
Can I Use the Bed's Power Outlet for Other Devices?
Using the adjustable bed's power outlet for other devices is not recommended due to potential electrical overload and safety risks. Guarantee proper slatted bed frame installation and utilize dedicated outlets for external devices to maintain functionality and safety.
How Do I Dispose of the Packaging Materials Responsibly?
To responsibly dispose of packaging materials, explore recycling options and eco-friendly disposal methods. Consider local donation or reusing materials to minimize waste. Verify local recycling rules to guarantee proper handling and contribute positively to the community.
The installation of an adjustable bed at home involves systematic steps that guarantee proper setup and functionality. Unpacking and preparation lay the groundwork for the assembly process, while putting together the bed frame forms the structural foundation. Power and remote setup facilitate operational control, and syncing split bases is important for dual configurations. A final assembly check ensures all components are correctly aligned and functional. Adherence to safety guidelines and troubleshooting techniques is vital for best performance and longevity of the bed system.